
Beginner Ambient Sourdough Bread
An elegant iteration on "No Knead Bread" that can serve as a framework for your home baking.

Last Updated: 3/6/2023
Recipe Summary
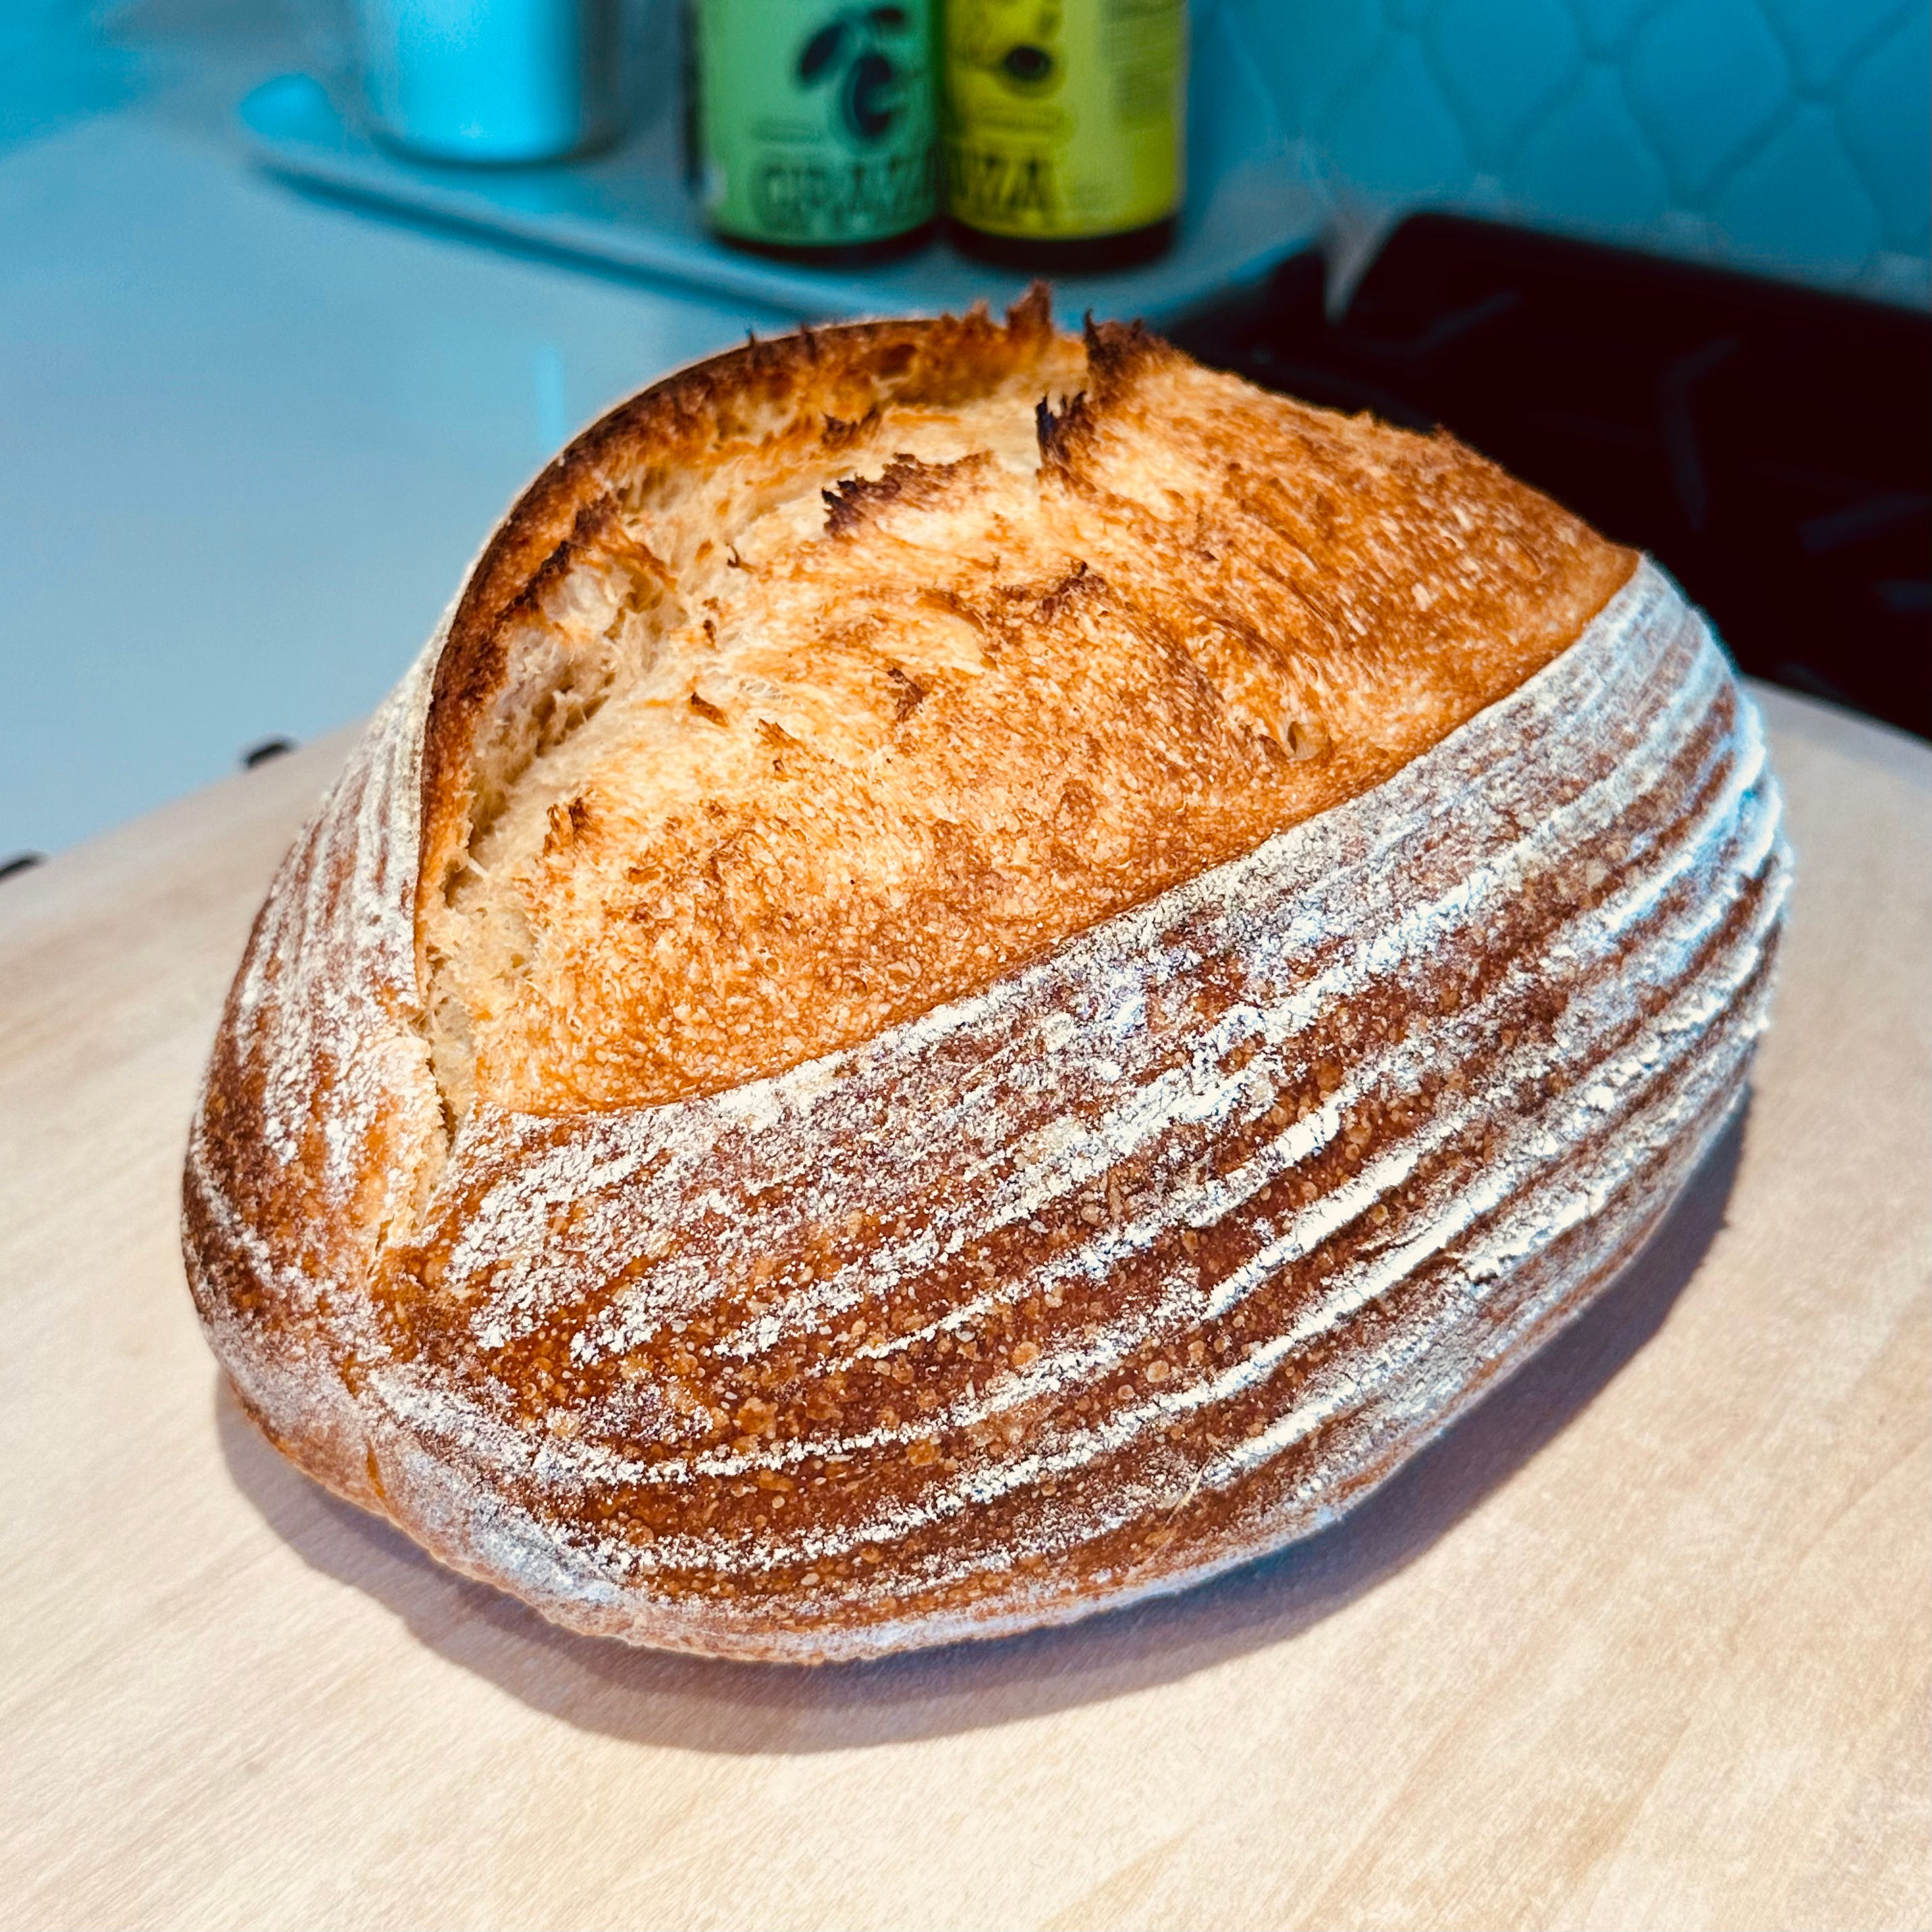
This recipe produces a loaf with good volume, a delicate lactic sour flavor, and the appearance of “San Francisco sourdough.” When I say “the appearance San Francisco sourdough,” I’m referring to what you would identify as sourdough bread if you had to pick it out in a police lineup.
Formula and Process
Levain
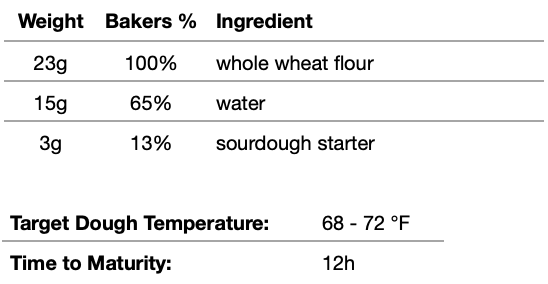
I maintain a 65% hydration whole wheat stiff-textured sourdough starter, but you can use any starter here as long as it’s been recently refreshed.1
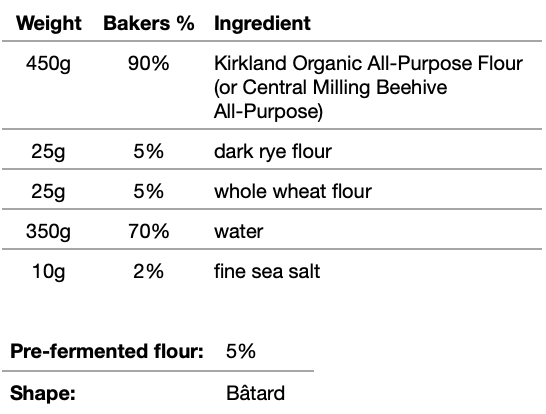
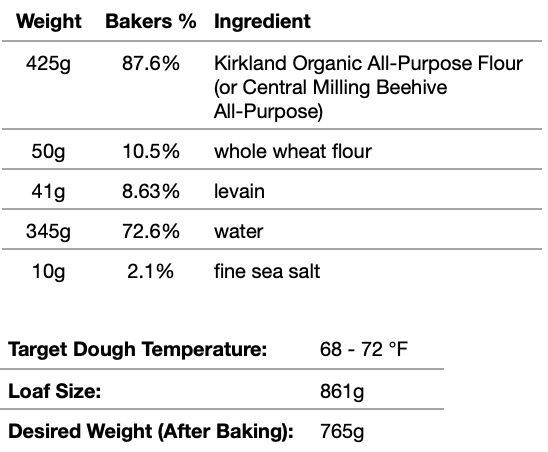
Dough Formula
Process w/ Example Schedule
Day One:
Combine all ingredients in a mixing bowl until no dry flour or salt remains and the levain has been fully dispersed.
6:30 PM - Start a timer.
6:35 PM - On your work surface, slap and fold the dough for two minutes. You can return your dough to your mixing vessel, but it’s not necessary.
6:40 PM - Repeat the previous step.
6:45 PM - Repeat the previous step if necessary. At this point, your dough should feel strong and no longer sticky to the touch. If it’s still sticky, wait until the dough is relaxed enough to slap and fold again, about 5 more minutes, and finish off your dough development with another round. Return your dough to the mixing bowl, cover with a solid lid, and let the dough rest overnight.
Day Two:
6:30 AM - Flour the top of your dough and dump it onto your work surface with the help of a bowl scraper. Moving around the inverted circle, gently fold the dough into the center, popping any huge bubbles you encounter. Invert your dough round and tension slightly with your hand. Move to an unfloured area of the work surface and let rest for 30 minutes. If it’s dry in your kitchen, invert your mixing bowl over the dough for the duration of the bench rest.
7:00 AM - Lightly flour the top of your preshaped round and flip it over. With both hands, fold the dough in half as you lift it, and lower it into a bâtard-shaped banneton2. The seam should be centered in the basket, and you may need to pinch the bâtard closed near the ends.
7:00 AM - Cover3 and begin your final proof. This will take 5-6 hours at 70 °F.
1:00 PM - Score and bake your bread. If you want that burnished orange “San Francisco Sourdough” aesthetic, make sure that the final half of your bake is carried out no higher than 440 °F.
Using these timings, a dough mixed at 6:30 PM from a starter fed at 6:30 AM would be ready to bake at 1 PM the following day. Work backwards from 1PM to determine when you need to start preheating your oven.
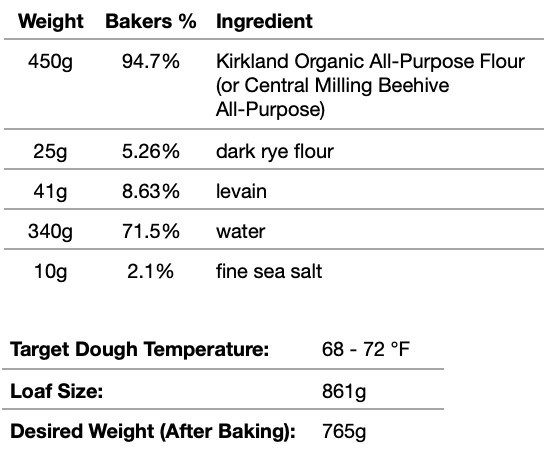
Variation: Slightly Higher Whole Wheat
This brings the overall percentage of whole wheat in the recipe to 15% and the total hydration to 71%. You can continue to adjust the flour blend, but increasing the percentage of whole grains past 15% changes the flavor profile to something perceptively different than what I’m going for with this recipe.
Recipe Notes
A Note on Flours
You can use King Arthur All-Purpose or King Arthur Sir Galahad here instead, but I don’t recommend them. Both flours favor strength over extensibility and will require an autolyse step first. In this scenario, you’d follow the recipe as written but wait a half hour before adding the salt and start your timer from there. If using King Arthur All-Purpose Flour, I recommend adding an additional 10g of water to the recipe as written, as that flour tends to be very thirsty.
Likewise, I don’t recommend using King Arthur Bread Flour, Bob’s Red Mill Artisan Bread Flour, or the equivalent for this recipe. The extra strength those flours provide are at odds with the texture I prefer, and the long fermentation time of this recipe combined with the fairly high salt content and conservative hydration means that your dough will be plenty strong on its own while still producing desirable crumb characteristics.
Central Milling Artisan Baker’s Craft Plus will work perfectly here, but you’ll need to increase the salt to 12g / 2.4% or 12.5g / 2.5% due to the increased enzymatic activity. You may also need to decrease the amount of levain used to 25g, depending on how fast things are moving for you.
")
Kirkland Organic All-Purpose Flour can be purchased at any Costco with a membership, while my other recommended flour, Central Milling Beehive Organic All-Purpose Flour, can be purchased from Central Milling’s website and may be available at retailers if you live west of the Mississippi River.
A Note on Hydration
At 70% hydration using ambient fermentation, this recipe will produce comparable results to a cold-retarded dough at 74-75% hydration, though the taste and texture will differ slightly.
At ambient temperatures, use less water than you would if you were cold-retarding. The water loss that occurs near the surface of your dough in a refrigerator does not occur at the same rate at room temperature, which means that hydrating an ambient loaf to the same degree may cause the crust to soften after baking if not enough water was baked off.
A good way to tell if your bake is done at any hydration is to tap the bottom of the loaf. If it sounds hollow, it means enough water has baked off and the crumb has gelatinized and is beginning to set. If you’re unsure whether the sound is hollow enough, keep baking and check again in a few minutes. You’ll know.
Make note of the weight of your bread after the bake, as this is another characteristic you can use to determine when a loaf is “done.”
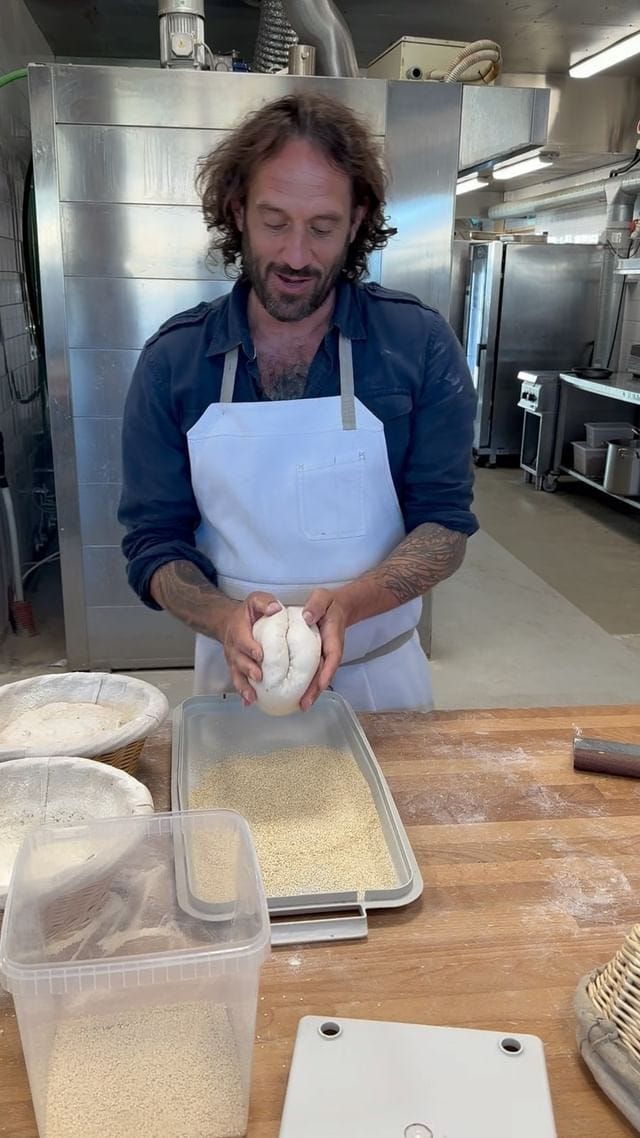
A Note on Slap-and-Folds
If you’re unfamiliar with the slap-and-fold technique, here’s a video primer with Richard Bertinet, the baker who popularized it.
Maurizio Leo has a good write-up on slap-and-folds over at The Perfect Loaf.
Slapping and folding allows you to develop your dough up front and rely on few (often zero) stretch and folds during bulk fermentation. I find it to be less labor intensive than the Rubaud Method, which is an in-the-bowl method that works equally well for slightly wetter doughs than the one in this recipe. I also find it to be less labor intensive than kneading, as you get an assist from gravity.
It’s typical to have to slap and fold dough for eight to ten minutes to reach full gluten development, but I’ve found that you can get the same results in 15 minutes with only six minutes of active effort if you build in some five minute breaks.
I have a post that explores different dough development techniques here:
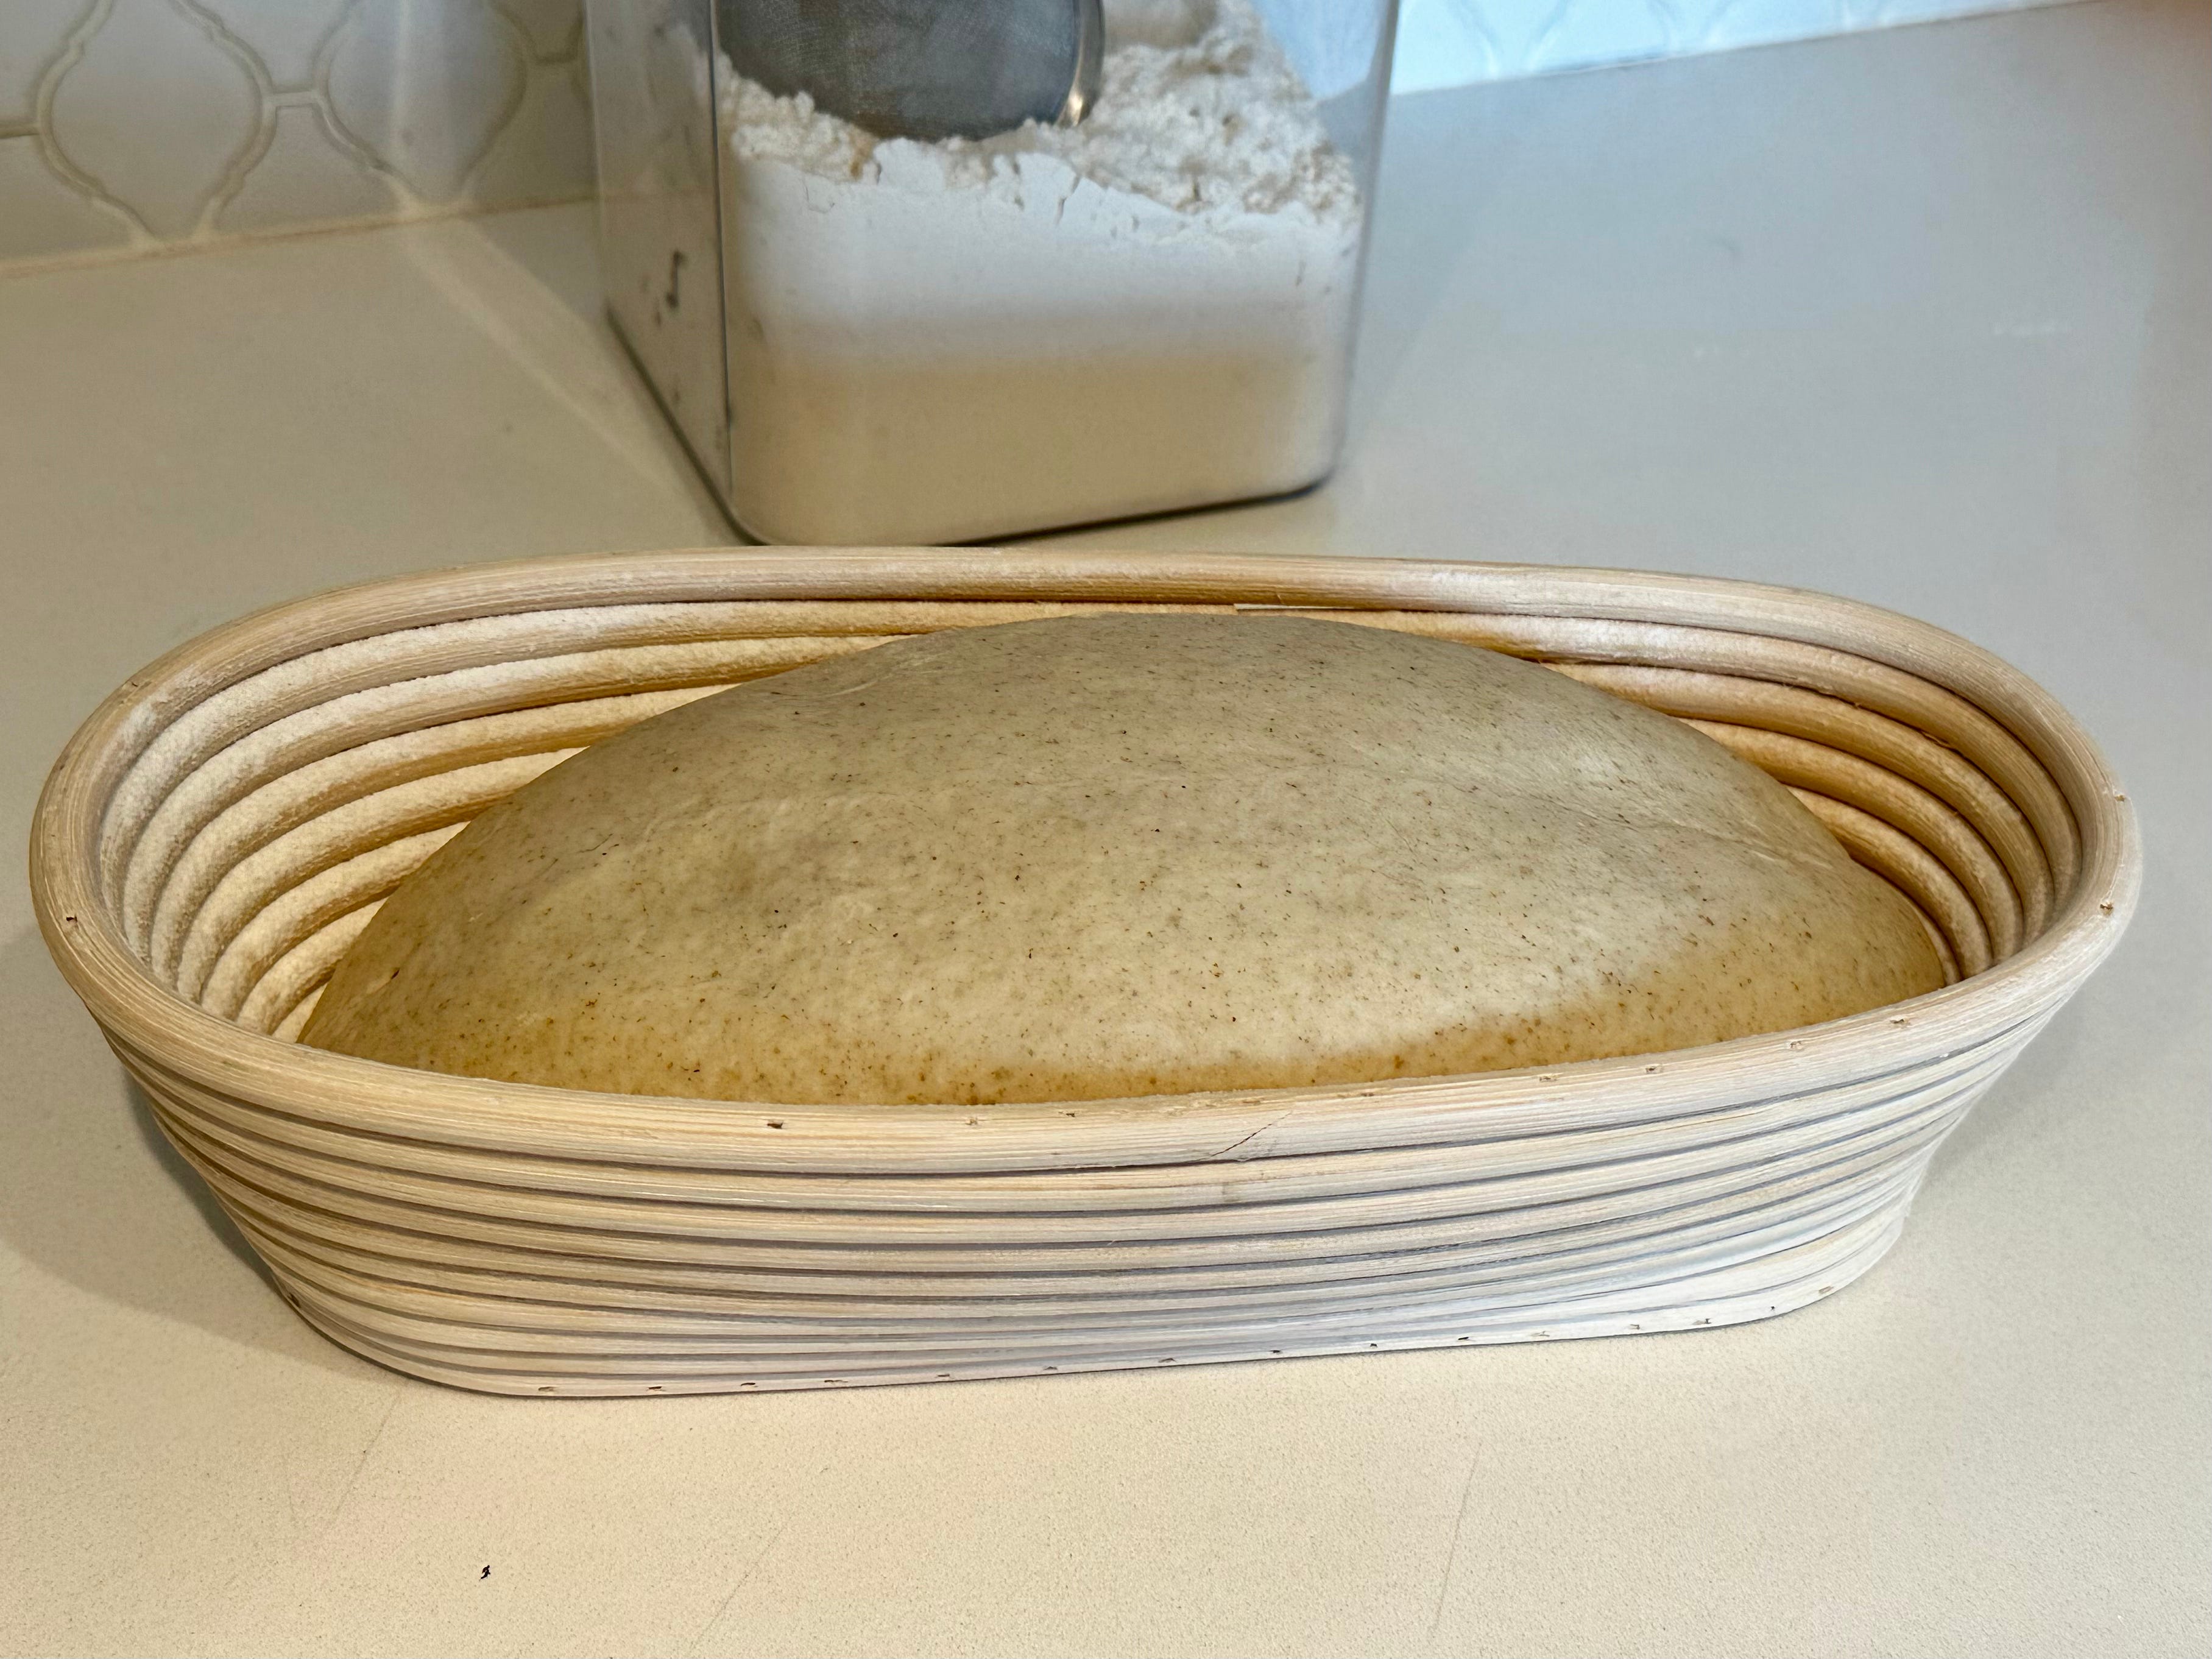
A Note on Pre-shaping and Shaping
When preshaping your dough into a boule, follow the method shown in this video (beginning around 7m 30s):
The “fold your dough in half” method I describe for final shaping above can be seen here:
This method works just as well for boules as it does for bâtards as long as your dough is neither over-relaxed nor too strong. Similarly, you may find this step difficult to perform if you’ve over-floured the top side of your pre-shaped round or have exposed the “sticky side” to too much flour.

There’s a Goldilocks zone with respect to dough strength—you want a dough that is strong enough to hold its shape, but relaxed enough to connect with itself during shaping. Note how the seam is barely visible in the above photo.
Now take a look at this loaf, which I mixed with 1g more salt during recipe testing and shaped the same way:
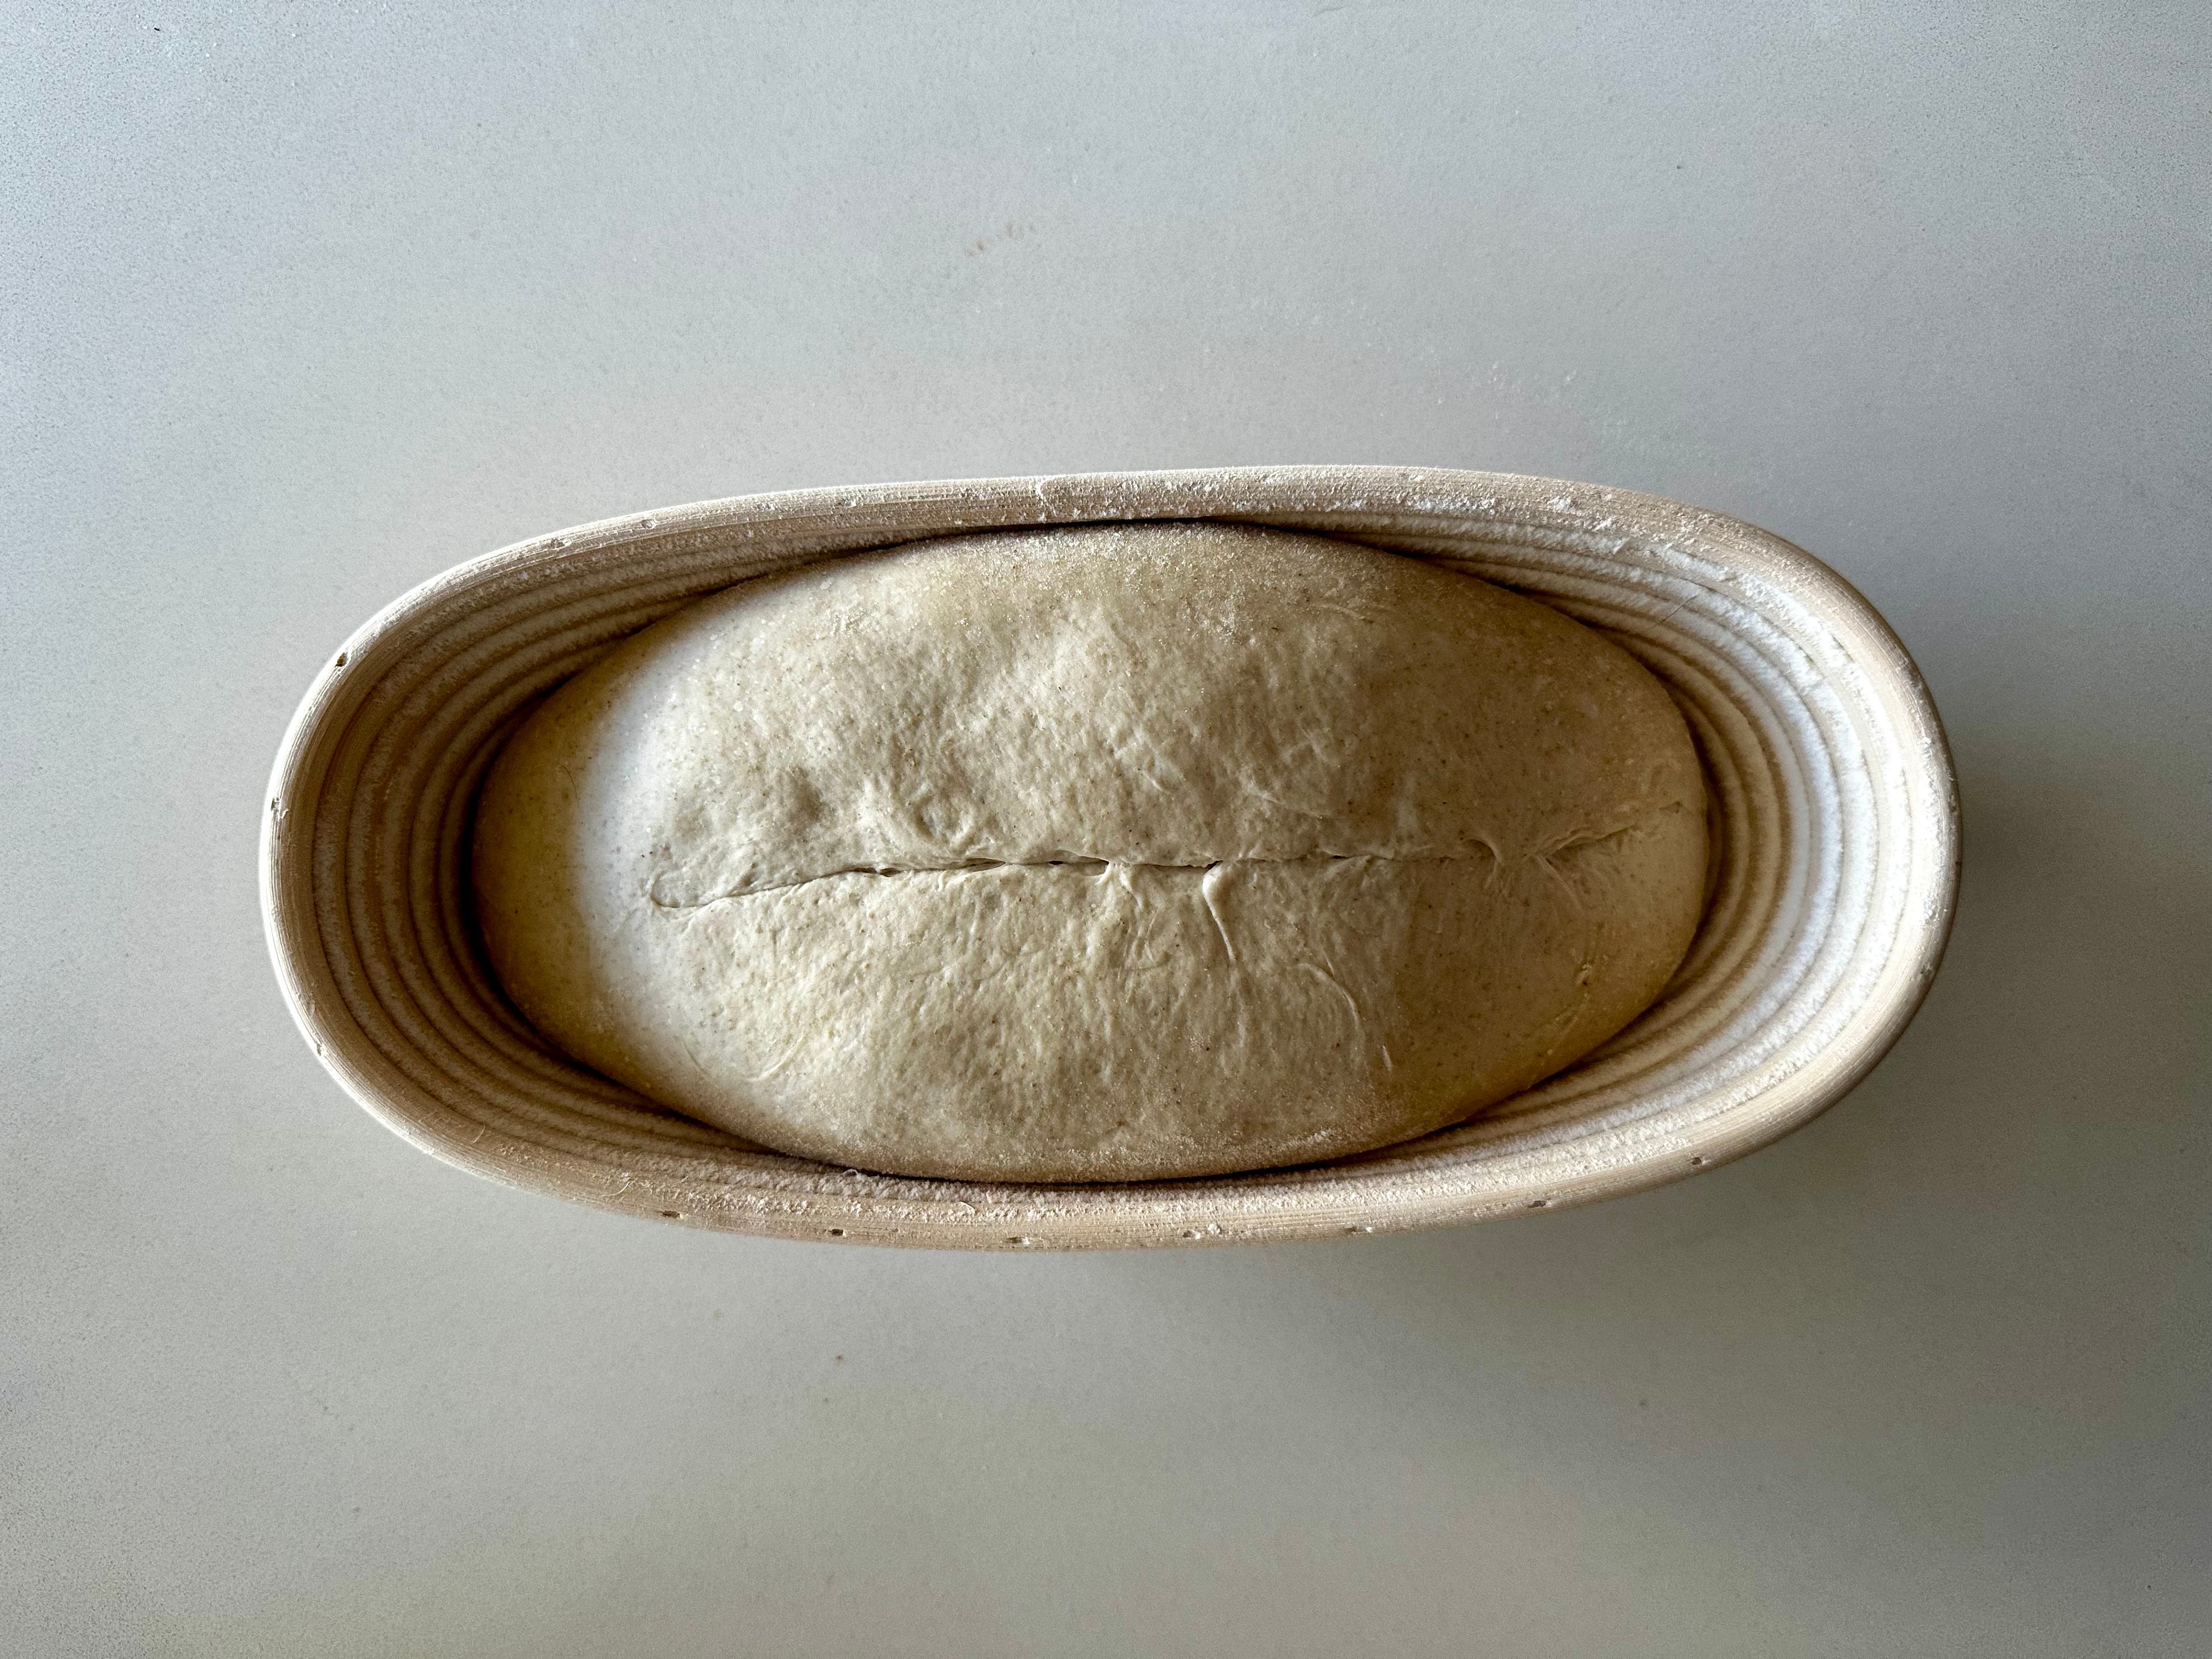
It’s not fully pulling away from itself, but it certainly doesn’t want to connect.
There are many ways to over-strengthen a dough—under-hydration, too much salt, overdevelopment—and they will all produce the same result: a dense loaf that has trouble expanding in the oven and isn’t as fun to eat. My formula and process minimizes the likelihood all of these issues, so long as you use the recommended flours.
A Note on Temperature
Admittedly, the temperatures and process described in this recipe are geared towards someone who keeps their kitchen around 70 °F. This is me now in Chicago, but it wasn’t me when I briefly lived in Houston. I’ll cover warm fermentation at warmer room temperatures in a future post.
If your room temperature is closer to 68 °F, add an hour to your bulk fermentation time AND your proof time. If your room temperature is closer to 72 °F, subtract an hour from each4.
A Note on Baking Your Bread
I’ve opted not to go into detail on this step here as there are a number techniques to bake good bread at home and it in large part depends on your set-up. For instance: do you have an electric oven or gas oven? Do you have a dutch oven or will you bake on a baking stone?
I intend to go deep on the ins-and-outs of these and other baking methods in future posts. In the meantime, you can scroll to the end of the King Arthur Pain au Levain video linked above for some ideas.
Happy baking!
This post may contain affiliate links. If you click an affiliate link and buy a product mentioned, it will directly support Existential Bread.
The amount of starter called for here is so small that using a liquid starter over a stiff one will make a negligible difference in our final hydration.
I cover the top of the loaf with a tea towel, and then cover that with a plastic bag. I let the sides and bottom of the banneton breathe, whether doing an ambient proof or cold-retard. I reuse the bags for bread storage once I’ve cut the bread.
According to French baker and educator Thomas Teffri-Chambelland, every 1 °F difference in temperature between 68 and 82 °F will produce a 7% change in fermentation rate. This has been my experience, anecdotally.